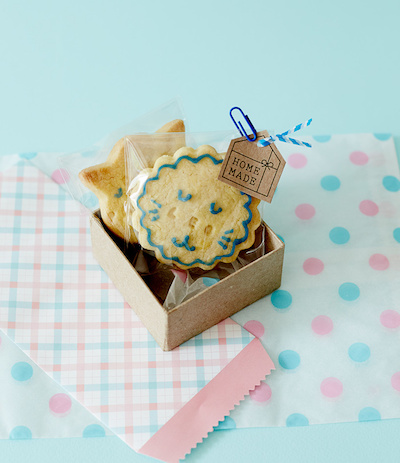
Home Made Sugar Cookies
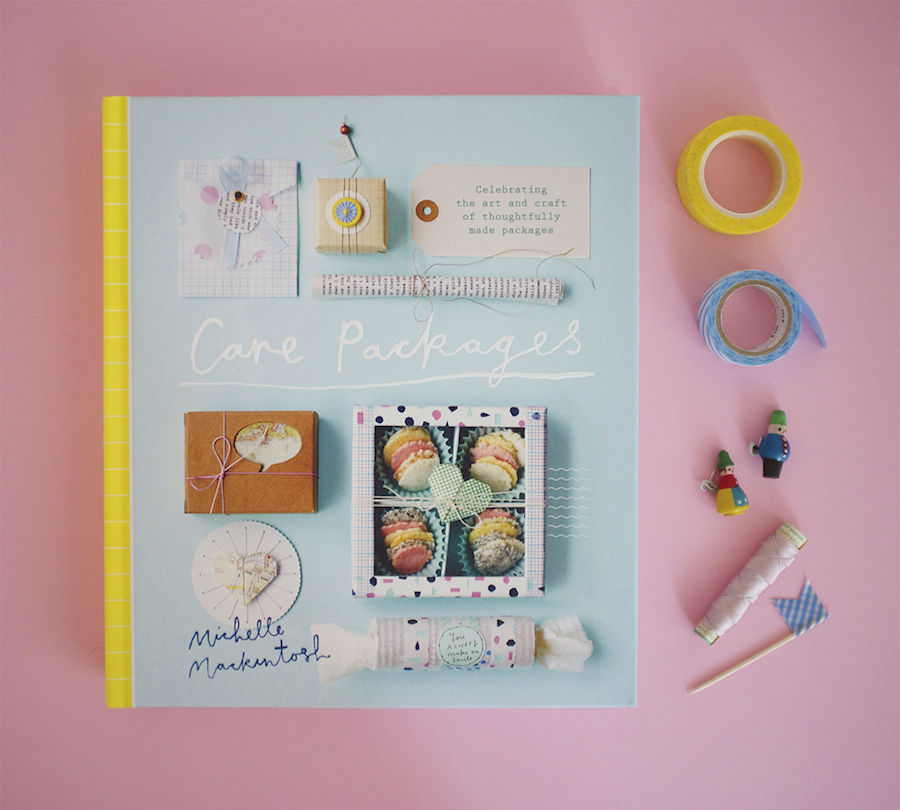
In her new book Care Packages Michelle Mackintosh shows us how easy it is to reach out and connect with those you love with beautiful parcels filled with thoughtful gifts.
13 May 2016 | HARDIE GRANT BOOKS
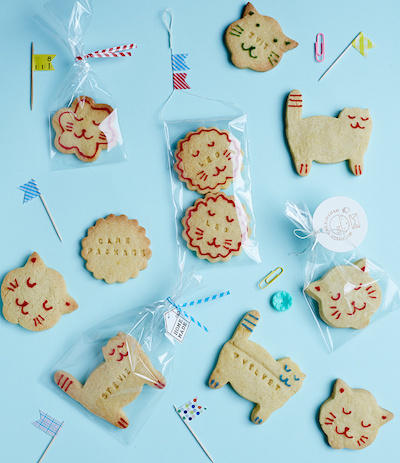
Michelle Mackintosh's Sugar Cookies in particular would have to be one of the sweetest ways to treat your loved ones. They also make the PERFECT Autumn weekend activity!
I am completely addicted to making cut-out biscuits (or cut-out cookies, as my American friends know them). I travel to Japan regularly and never come home without a new cookie cutter. Kappabashi-dori (also known as Kitchen Town) in Tokyo is a long street in Asakusa devoted to kitchenware. It’s a dream destination for the home cook or baker, where you’ll find cookie cutters in hundreds of different shapes and sizes.
I often spend a day making a double batch of this recipe for Christmas presents, parties or multiple care packages. Once these biscuits have been integrated into your baking regime, you’ll find so many new and interesting ways to cut and decorate them. My favourite cookie cutter shape at the moment is my fat British Shorthair cat one (see below). I can make my own Bronte-shaped biscuits, which is just about my favourite thing to do.
1 egg, lightly beaten
225 g (8 oz) softened butter, cubed
1 teaspoon vanilla essence
200 g (7 oz) caster (superfine) sugar
2 teaspoons baking powder
415 g (14½ oz/2¾ cups) plain (all-purpose) flour
Makes roughly 24 cookies
Storage: airtight tin or Tupperware
Preheat your oven to 200°C (390°F). Line a baking tray with baking paper and set aside.
In a large bowl, rub the softened butter into the sugar with your fingertips until combined, then beat with an electric mixer on medium speed until the mixture turns pale.
Add the vanilla essence to the egg and stir to combine. Beat the egg mixture into the butter mixture a little at a time; it’s important to do this bit by bit so the batter doesn’t curdle.
Sift the flour and baking powder into the bowl and, using a rubber spatula, fold into the wet mixture until combined. Once the dough has come together, transfer it to a lightly floured work surface and divide into two balls. Set one ball aside and flatten the other with the palm of your hand. Lightly dust your rolling pin with flour and roll out the dough until it is 5 mm (¼ in) thick. Cut the dough into shapes with your cookie cutters. Transfer the biscuits to the lined baking tray and set aside the dough scraps. Repeat with the second dough ball.
Gather up all of the dough scraps and form into a ball. Flatten with the palm of your hand, roll out with your rolling pin and cut into squares. Transfer to the baking tray – these biscuits are perfect for keeping hungry mouths and biscuit thieves at bay if you are baking for a specific occasion.
Bake the biscuits for 6–8 minutes, until the palest shade of gold. You do not want your biscuits to brown; for best results, stay close to the oven and check the biscuits’ progress after 5 minutes. Transfer to a wire rack to cool completely before decorating.
The icing (frosting) and decorating stage is where you can be most creative! I often use a pre-made ‘paint-style’ icing product to pipe my decoration onto the biscuits – this saves on time and cleanup. You can of course whip up your own icing and pipe it with a traditional bag and a nozzle size that is right for your design.
For more ideas on thoughtful gifts and gestures check out Michelle Mackintosh's new book Care Packages.